

When I ordered my lights this year I decided to order a pixie 16 with 16 string of 50 pixels to convert my mini trees to RGB. For this I only needed 5 of the light strings but I figured since it was only about $100 extra to buy the package than the 5 sets of lights and the controllers I needed that I may as well go big. Initially I had planned to use a couple of the extra string to convert my garage trees to RGB. But what to do with the rest?
I had initially thought about using some of the extra strings to build RGB arches, but then I had the idea of building a matrix screen. I decided to go with a 25×32 pixel screen with 2″ spacing between the pixels. The size was determined by the number of lights I had available, the spacing had come from research that 2″ was the ideal spacing for a viewing distance between 10′ to 100′. I ordered a sheet of PixelNode Net from Holiday Coro. 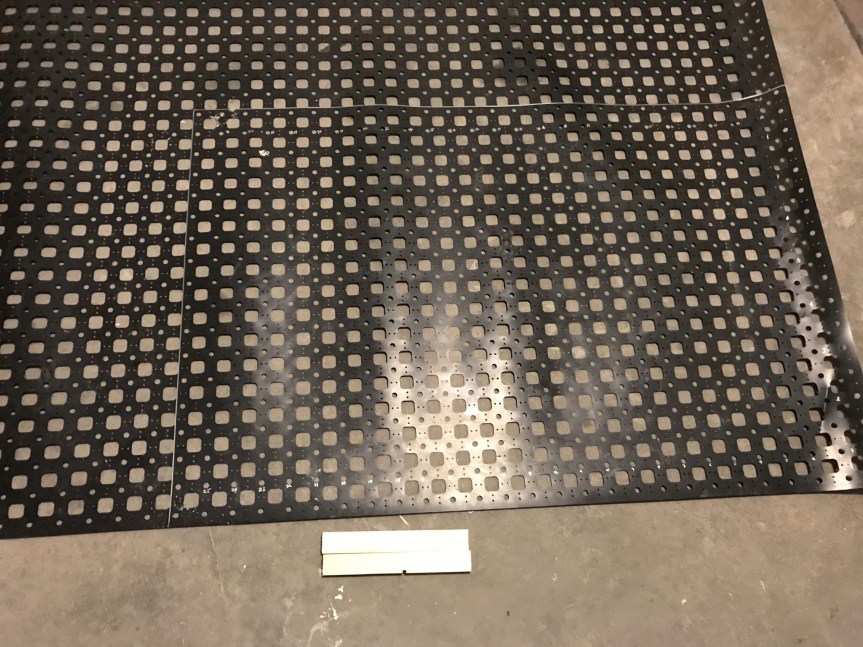
This would provide the canvas and spacing for the lights. Now for the tough part, how to build the frame and how to mount it in the ground?
Initially I was debating between conduit, pipe or wood, I was leaning towards the plumbing pipe option as I thought it would be light and black pipe would blend nicely with the PixelNet. But I am not overly familiar with working with Pipe and was worried I would not get the size perfect and not be able to create a perfectly square frame. I was also unsure of how I would be able to attach the PixelNet, ZipTies were an option but there is a possibility the net could move and bunch up, I wasn’t sure if screws would weaken the pipe or cause it to crack so I decided to build out of 2×1 wood strips. It quickly became obvious that the 2×1 would not be strong enough when 2 pieces snapped under no load after been cut to size. I decided to upgrade to 2×2’s.
Once I had decided what to build out of I still needed to solve the problem of how to hang or mount the matrix. I really didn’t want to build ground stakes into the frame as I thought hammering them in would weaken the structure of the frame (and a possible mis-hit could break some lights). Luckily I was walking through Canadian Tire and noticed some basket hangars that looked like they would solve my problem.

Now I have a plan, it was quick to build the frame, once I had it all pulled together I cut the PixelNet to size, painted the frame, mounted the PixelNet and added 2 eyehooks to hang it from the basket hangars.


Now the frame was complete the next step was to add the lights. This took much more effort than I had anticipated, inserting a string of 50 pixels caused me to break out in a sweat and made my finger incredibly sore (soft office worker hands). One thing I did find useful when plugging in the lights was to us a 1/2″ socket to ensure the bulb were seated.


Once I had al the lights in I could then start to test .


The one challenge I did come across while going through this is; once I decided to build it I planned on using my Pixel Tree controller to run this matrix and using my new pixie16 to run the pixel tree and my converted to pixel mini trees. After getting the matrix built I pulled out my Pixel Tree controller to re-purpose it only to find out it is a 5v system and my new ones are 12v, so not compatible. This actually caused my quite a bit of anguish tying to figure out where to put my prop since the mini trees had to be close to the matrix.
Over all the Matrix was pretty simple to build and quite cost effective (since I was using the lights and controllers I already had in excess), materials excluding the lights were ~ $100. It took me about 2 weeks in duration to plan, build and insert the lights but maybe about 2-3 hours of effort in the build and I’m quite happy with the results.

One thought on “Building a Matrix”