

It’s been a busy couple of weeks getting ready to start my build for the year. First order of business was to turn my garage around from summer to winter mode. Once that was complete its time to clean up the yard, put away the furniture, drain the pond, and rake the leaves. I have a pretty strict rule that all these things need to be done before I can begin putting up my lights. I need to have this rule or I’ll get into the lights and leave the rest a mess that’s even worse to clean up in spring. Once all this is done I can start putting up my lights.
I got the garage sorted a couple of weeks ago, putting away the bikes, car and bringing out the lights. Then it was on to cleaning up the yard; first order of business was to get the branches I cut from the tree in the back yard to the dump. After that was complete I started raking up all the leaves, luckily it seems I left it late enough there won’t be another big dump of leaves. It’s a real balance in Calgary between raking too early and having to do it again or leaving it too late and having them buried in the snow until spring. While I was raking the leaves I also drained my pond so I can get all the leaves and gunk out of it. Finally a last trim of the lawn for the year.
Now all the dull stuff was wrapped up I could begin putting up the lights. My goal for the weekend was to get up all the lights that require access from the 2nd story roof. Once it snows I cannot get up there so getting this done early is key. I missed my window last year and had to rent a boom lift.
On Saturday I got the RGB bulbs on my upper roof (new for this year, last year they where white LEDs). I also got the RGBs that run along the upper gutter and down each side of the second story up.


I had thought ahead last year and left all the shingle clips on each string to make for quicker assembly, but because of the changes I’ve made to my layout I had to reinstall the clips as the strings were running in different directions which altered how the bulbs needed to sit in the clips. The one string that did not change was the one that had a broken RGB so it needed to be changed out too. Here’s to hoping next year the layout remains the same. I also got the icicles installed on the upper gutters. With all this done I would not need to go back up on the second story roof, fingers crossed.
Sunday I had another few hours available, I set out to get the rest of the lights and run the networking for all the lights I install from the 1st story roof that I cannot access with just a ladder. This includes the 2nd story windows and the garage roof line. I also needed to move where I mounted one of my controller boxes because of how I changed the layout and the start point of the strings. Putting the lights on the windows was a breeze as the clips all remained the same. Connecting these to the controllers was also easy as it remained in the same spot as last year. Putting the lights on the garage roof was really easy as well. I’d used the string from here on the upper roof so I had to clip the new string but it went relatively fast and easy (maybe the warm weather and direct sunlight made it seem like it went faster than it actually did). I hadn’t reused this string in the same spot as the upper roof would require the same clip pattern, this allowed me to get it done sooner. I was also planning on using the new 100 bulb strings I’d ordered to run from the garage roof along the gutter to the living room, turns out the 100s are just 2x 50 bulb strings. Finally I made sure to balance the lights on each side of the pitch (18 left -14 top – 18 right), last year it was a couple of bulbs longer on one side and it bugged me way too much. Overall all of the bulbs went up very easily because the mounting points were the same even if the strings and clips were configured a little differently.
Once all the bulbs were mounted it was time to relocate one of the RGB controllers. This sat in the middle of the 2 windows and ran the upper left and upper right side, these have been combined to a single 100 bulb string. This year the controller would be running the entire upper section and the 2nd story roof line. This meant I needed to mount the controller on the left side of the house. When I pulled out my drill to put some screws in the side of my house I noticed the chuck key was missing and I still had the 1/2 inch bit in it that I had drilled the holes in the grass to install the candy canes and pathway lights last year. Luckily I have a neighbour who has multiples of anything you could ever need, a quick visit to him and a brand new key was procured. His only condition on giving this to me (he had 3 brand new spares) was that I taped it to the cable instead of using the clip. A couple of quick holes a little sealer and a couple of screws and the controller was relocated. Last thing to do was to connect the network cables and I’d be done with everything that I could not access from my ladder. I did check every network cable before hooking them up, lessons learned from last year. I bought a network cable tester to do this but is signalled my bad cable from last year was good though it still would not work when connected to the controllers. It ended up I tested each cable with the LOR hardware utility hooking up to a controller and making sure I had signal.
This wrapped up my build for the weekend, I’d run out of time and needed to clean up before dinner and my hockey game. When I got home from the game I ran some quick tests on the lights, at first the string on the upper roof were off colour, when I looked into it I has the channels setup wrong in the preview. A quick tweak and all was good, all string were lighting up as expected. A couple of additional issues did show up when running through some sequences (Santa Claus is Coming to Town and Oh Come All Ye Faithful). In Santa Claus is Coming to Town I do a red and white blend to make the house look like a Santa hat, on the windows the white top was off to the side. I think this is a misalignment between the way the string is drawn in the preview and how the lights are put in the house (I also need to tweak my upper gutter line a little too). I had similar issues to this on the garage last year.


The other was some strange behaviour in Oh Come All Ye Faithful where the multi colour lights were showing 1/2 the string instead of moving side to side, I need to research this as I am not sure if it is due to network configuration or the sequence, luckily I’m well ahead of the plan and have time to troubleshoot these issues (I also expected to have some like this).
It’s much nicer doing all this in a t-shirt at 18 degrees vs. in winter gear and gloves at -10. Overall it was a productive weekend, I’m ahead of schedule by almost a week and I’ve removed the risk of any weather related delays.
I also made some more progress on my sequences getting a few more knocked off and one particular one that was giving me writers block when trying to figure out how to sequence. One realization I made was a few of the songs on the NOW album would never be part of my nightly shows so they didn’t need to be overly spectacular, these were being done for my listening pleasure on Christmas day.
Build Progress
| This week | To date | |||||||
| Due | Complete | % | Due | Complete | % | Run Time | ||
| Build | 6 | 5 | 83% | 6 | 7 | 117% | ||
| Sequences | 2 | 1 | 50% | 34 | 38 | 112% | 2:06:09 | |
One last thing I did for the week was order a Christmas themed garage door cover. This had been on my list last year but renting the boom lift used up my budget for the door cover.
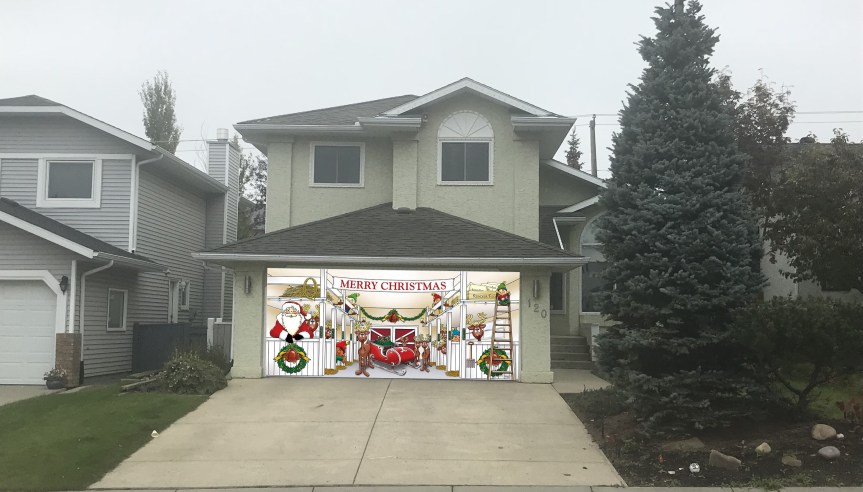
I also found it on Wayfair.ca for less money and in Canadian funds (so no border tax and handling fees from our courier friends). The Canada tax for doing all this gets out of hand, with the 30% premium because of exchange rates, triple or quadruple charges for international shipping, GST at the border and a courier processing fee for the import process, all added up it is probably 2x the list price in Canadian $ for everything I order from the US. On a positive note, when I was in Canadian Tire I found some flower basket hangars that will be perfect for mounting my matrix. How to mount this was something I was growing concerned over.
So far a good start to the build and far fewer problems than I anticipated. Fingers crossed.
