

Well it has been quite an adventure getting my north poles built. I am now complete other than needing to get some additional re-bar for the install.
After building the prototype mounting system I described in pt.1 I identified some design flaws although the overall concept was acceptable. I needed my stabilizers to be larger so I picked up a 4 1/8″ hole saw to make the stabilizers closer to the size of the pipe. I also moved to using treated wood vs. the cheap pine I’d used initially and upgraded to a 6×1 board to ensure full contact on the inside wall of the pipe. This upgrade worked great.
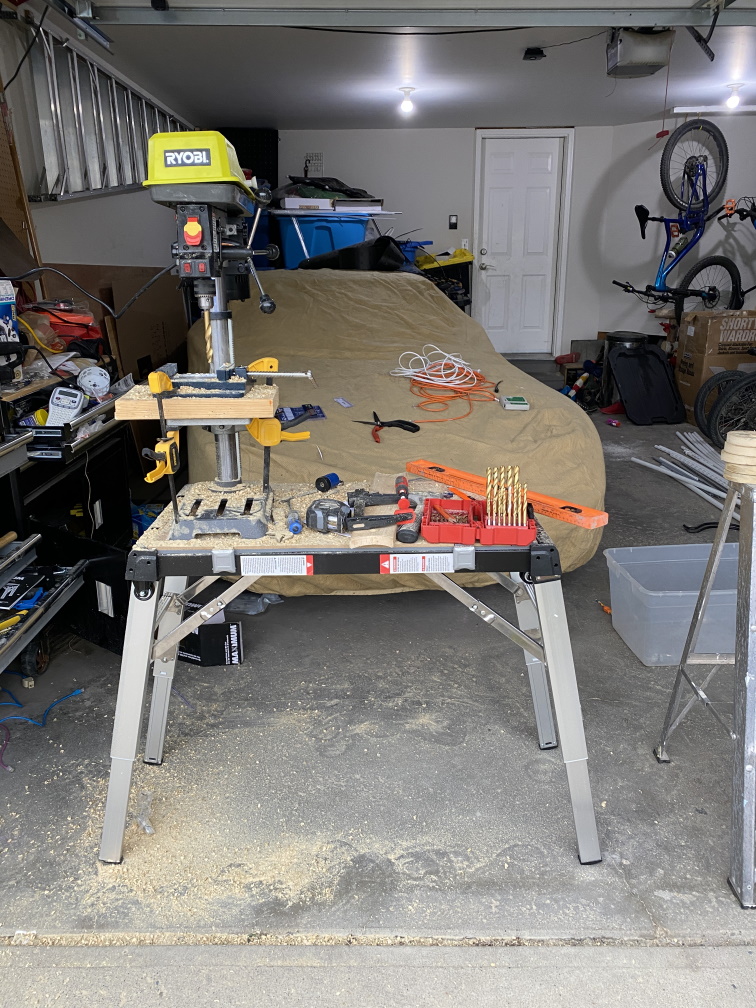
New tools for the job 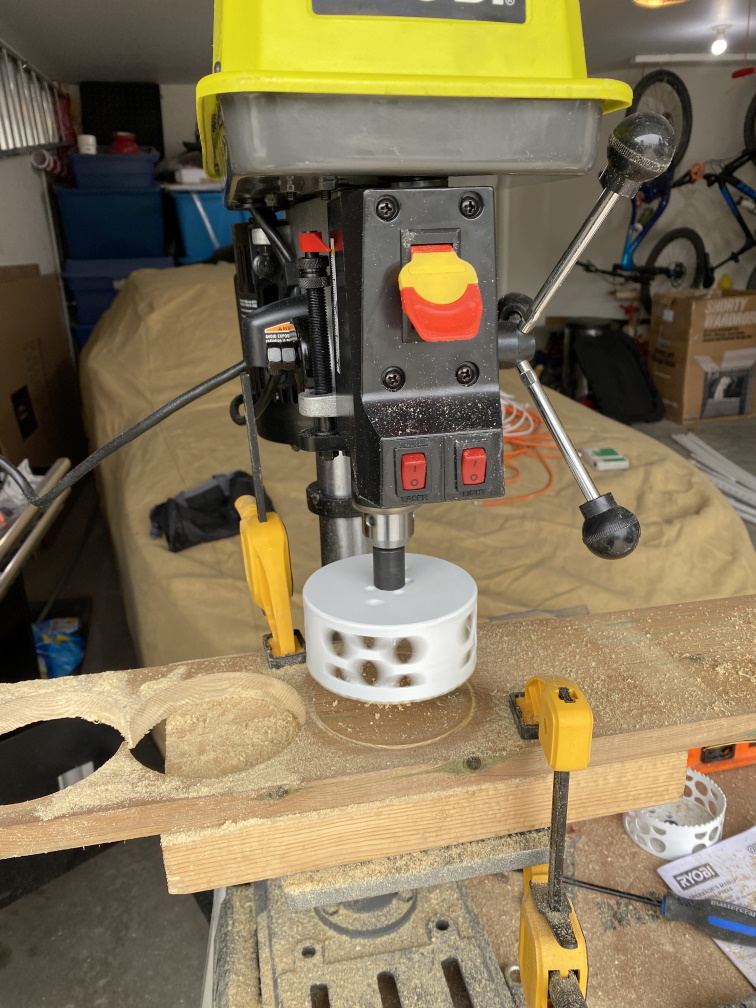
Cutting the supports 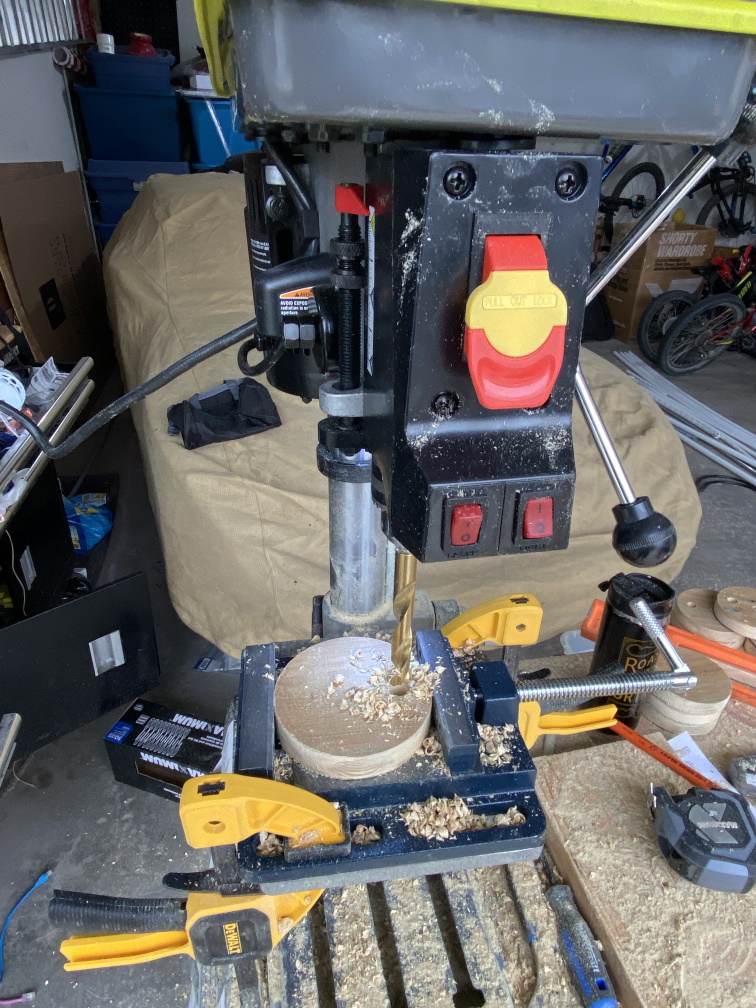
Drilling the alignment holes for the re-bar 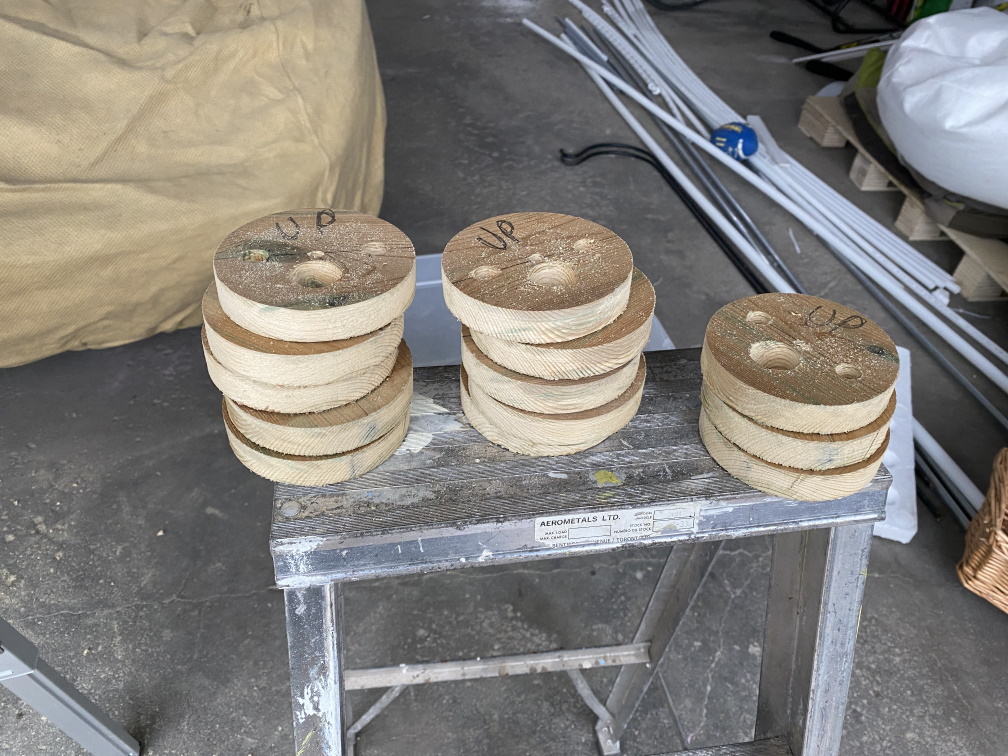
Finished up set of supports for the north poles
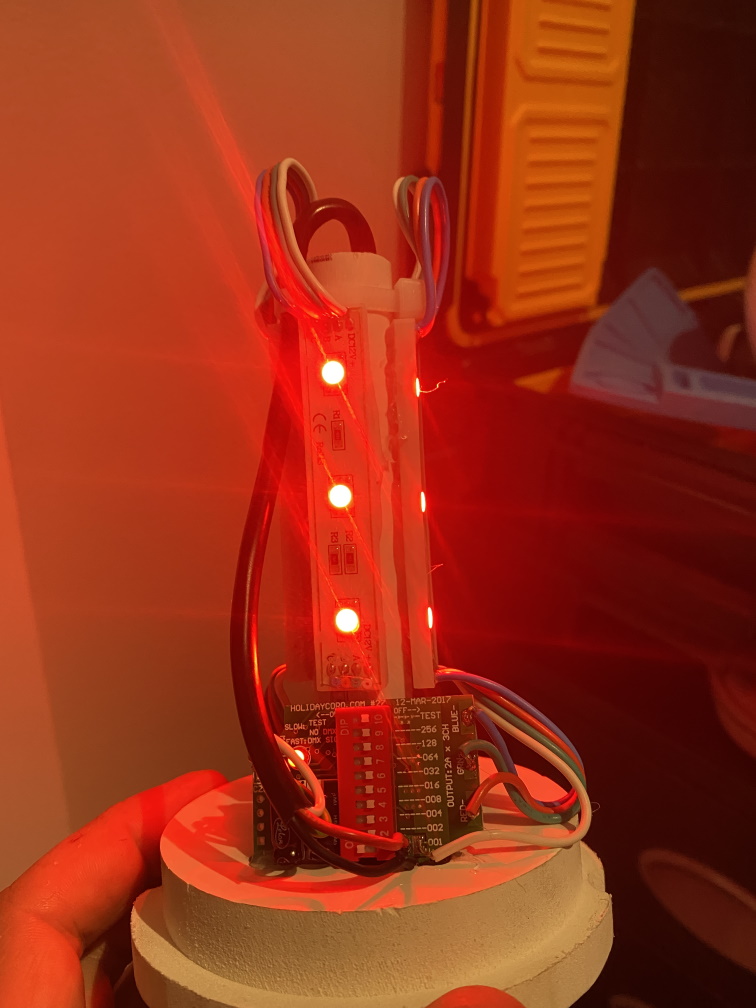
Next step was to start building the toppers, this required soldering the connectors to the boards so I could wire it all together. I didn’t want to use the Power over ethernet method so I picked up some 4 core waterproof connectors and 4 core wire to get it all together.
Lit up topper 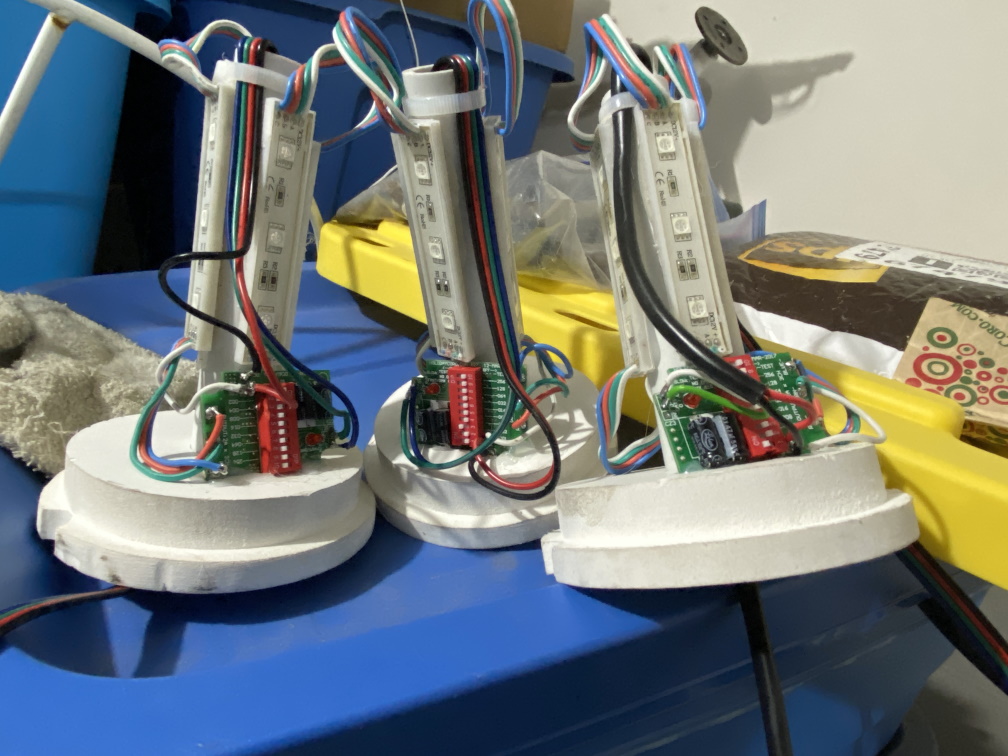
3 of 4 toppers 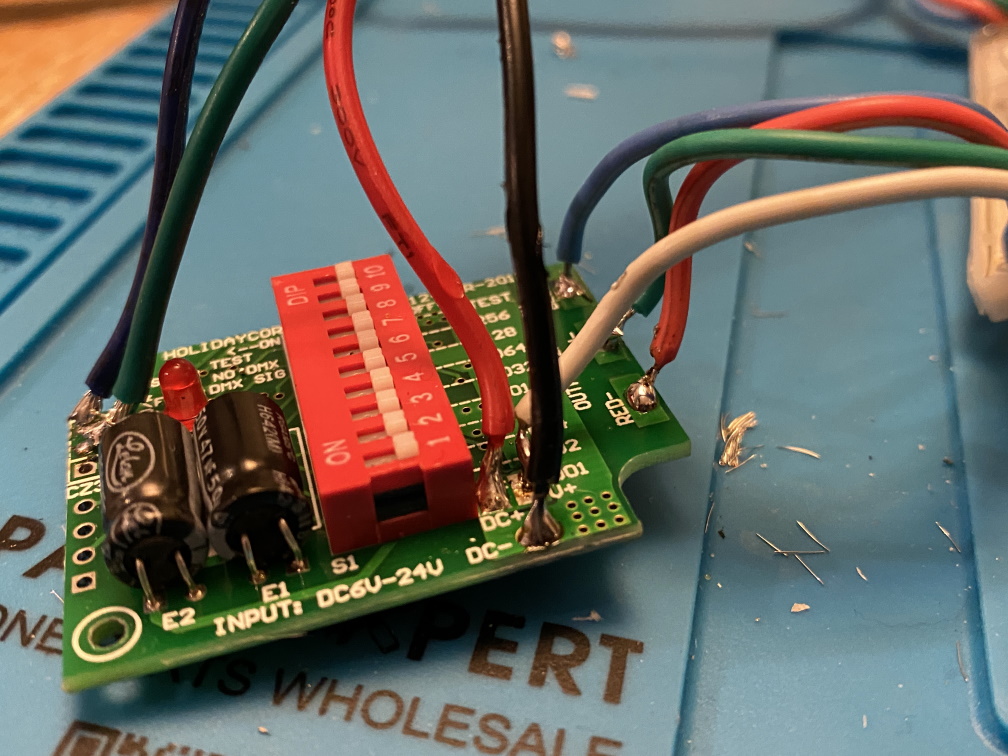
Much cleaner soldering than my initial attempts
My soldering was much better than my initial prototype, but when I got it all together something was wrong, the controller was loosing signal and was not providing the right colors or timing. After much gnashing of teeth and destroying my first topper trying to dissemble it I decided to build it up and test step by step. This required first twisting all the wires together and leaving the factory installed wire connected to the controller board. Testing, removing one of the 3 sets of wires from the board (Power in, Signal In, Out to lights) , soldering my wires on, test, repeat until all were complete. I had to take this approach because I couldn’t figure out what was wrong and there are multiple possible points of failure. This took much longer but I eventually got all 4 toppers working.
Once I had the toppers built I needed to test the full install with power supply and my new support disks. The install was a bit fiddly but overall mostly worked, except for the bolts I bought to mount the power supplies inside the poles were not long enough. I didn’t take into account the curvature of the poles so they were not long enough to tighten down. The last piece to do was stripe the poles, then put on the globes. I did have to grind down the globes a little on the neck to have them slide inside the poles the so they looked clean.
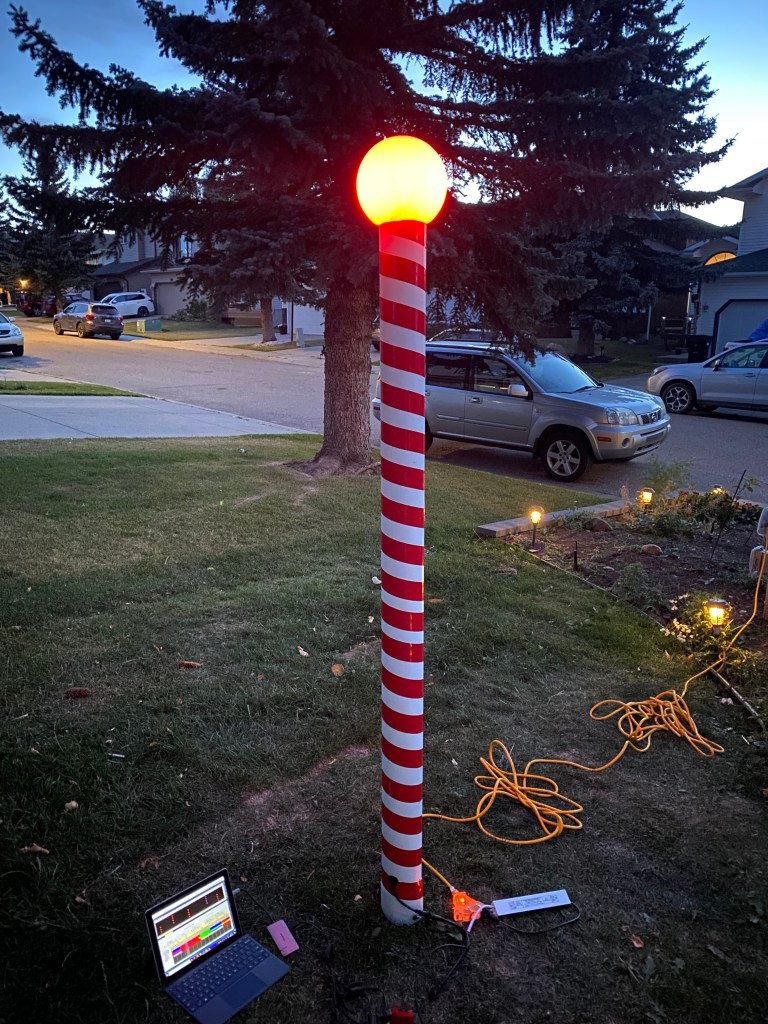
Lit up Pole 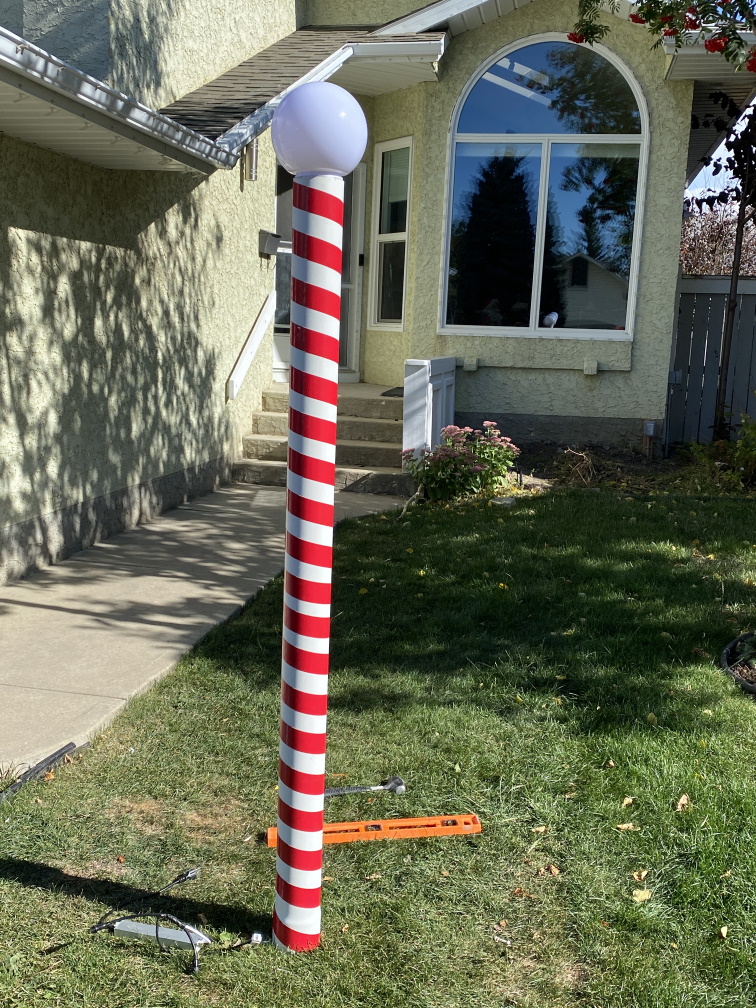
Test Install 
Power Supply in the pole 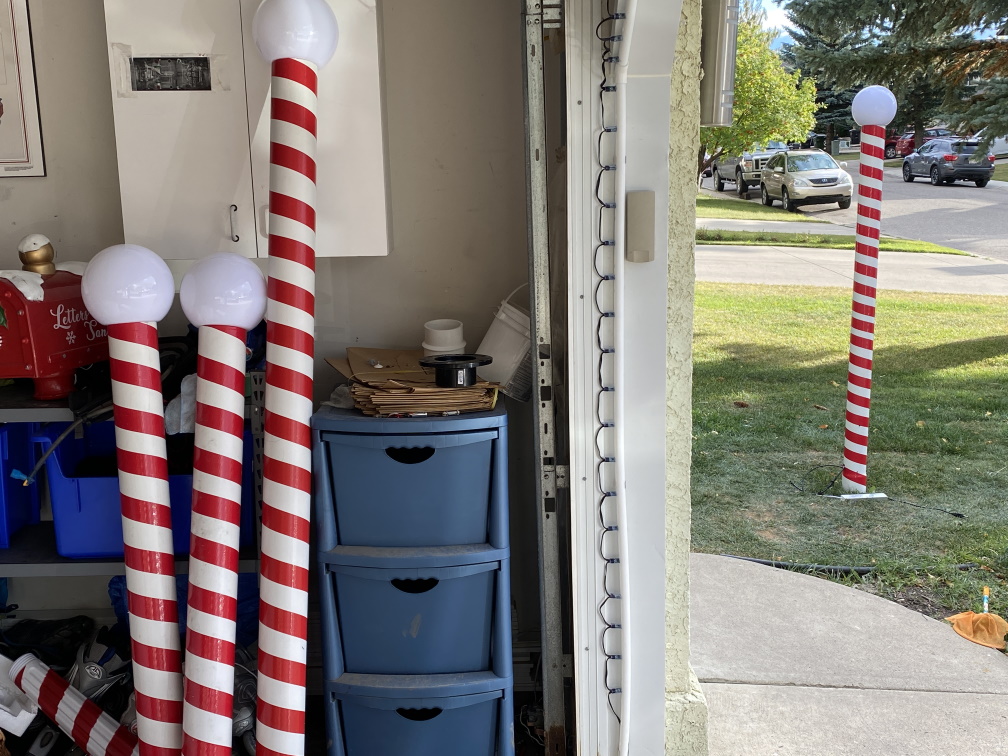
all 4 Poles complete
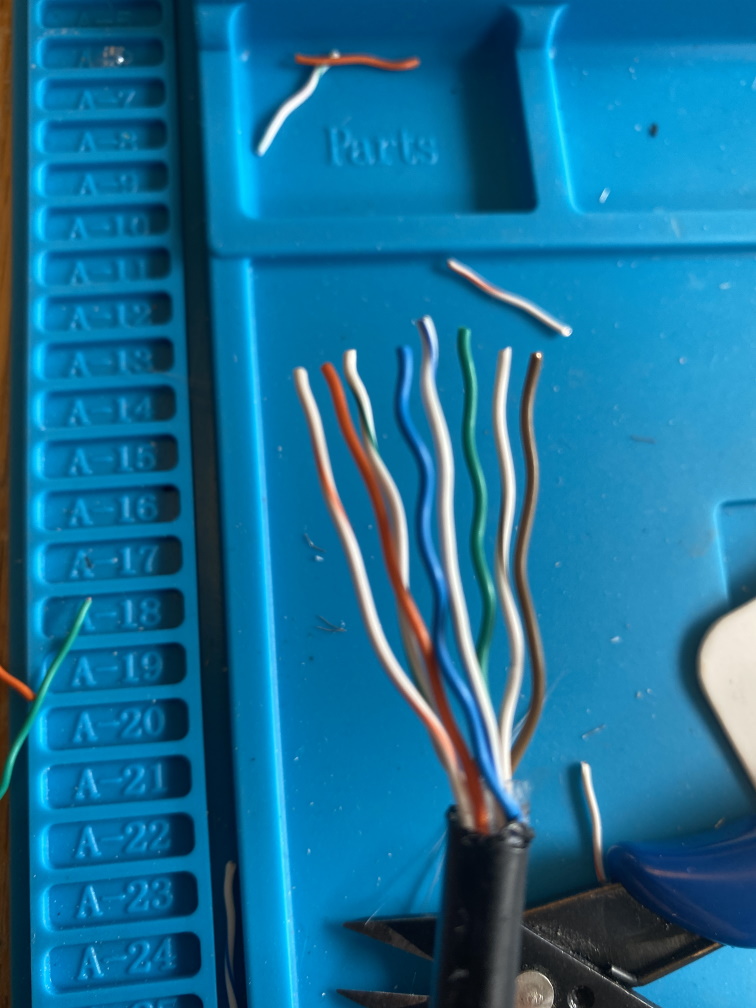
Once the poles were built I needed to build myself a conversion cable to move the LOR signal from pin 4 & 5 to a DMX signal on pin 1 & 2. I also needed to build the extension cables to run between the poles and the power supplies to power them. My ability to forget to add shrink tube on the wires I am soldering even when I have cut the pieces is unbelievable. I don’t think there were one set of wires I didn’t have to unsolder and re-solder because I forgot the shrink tube, forgot the screw cap to for the waterproof connectors, or soldered the wrong connector end on. Frustrating and time consuming but eventually I got them all done and working and could test with the cabling and power supplies as they will be connected outside.
standard cable layout 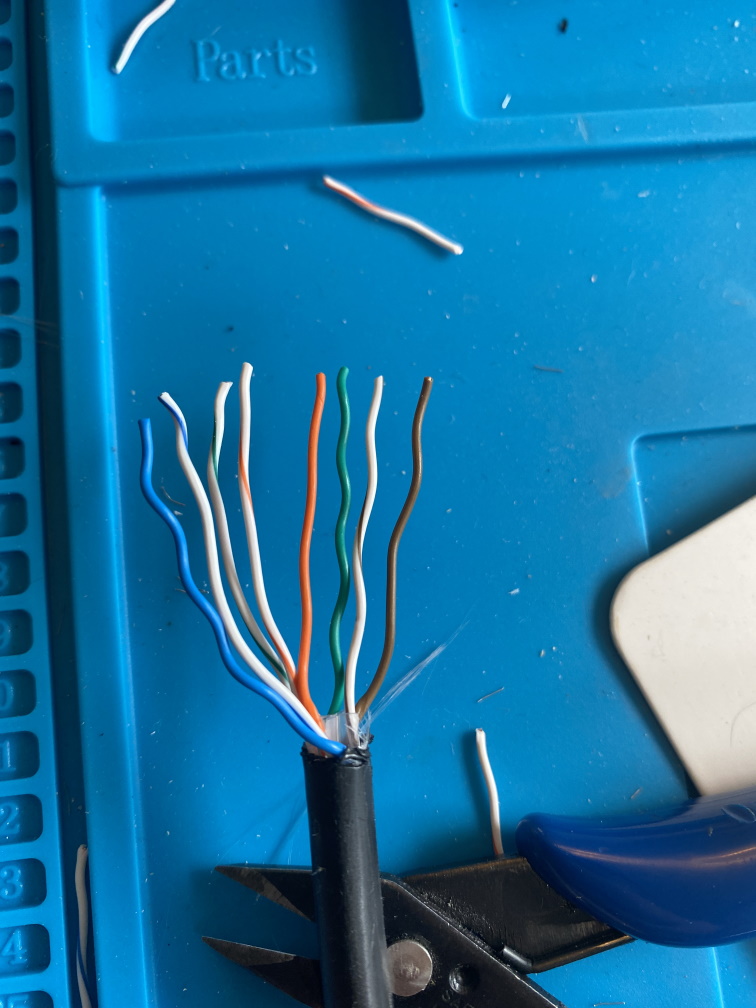
4/5 & 1/2 switched to cross over signal 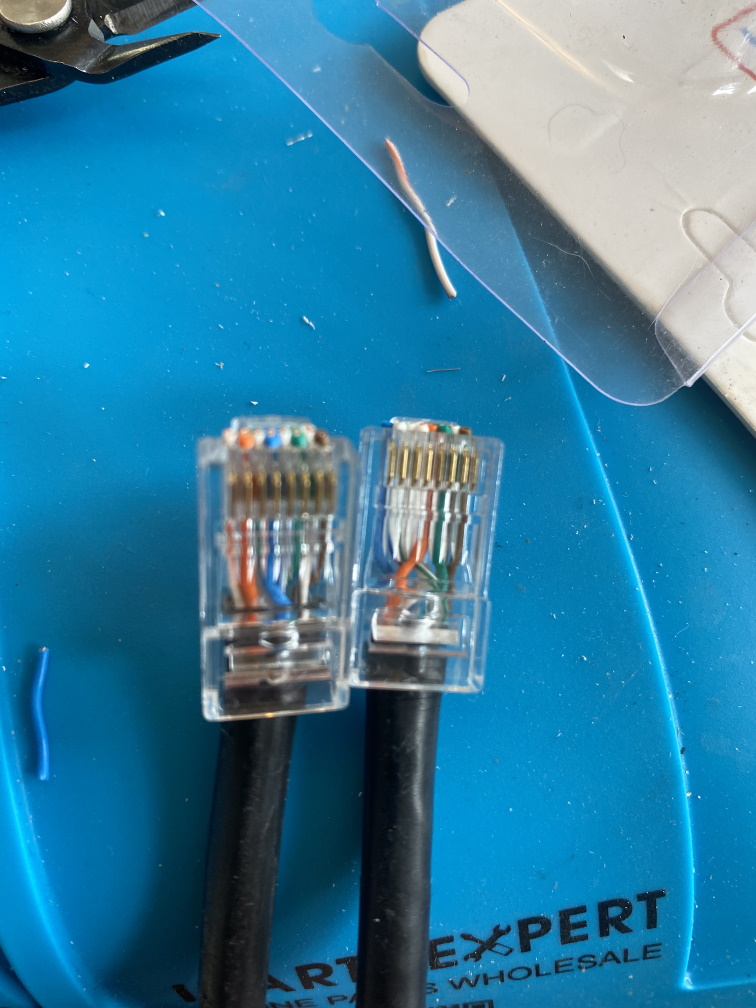
LOR to DMX cable 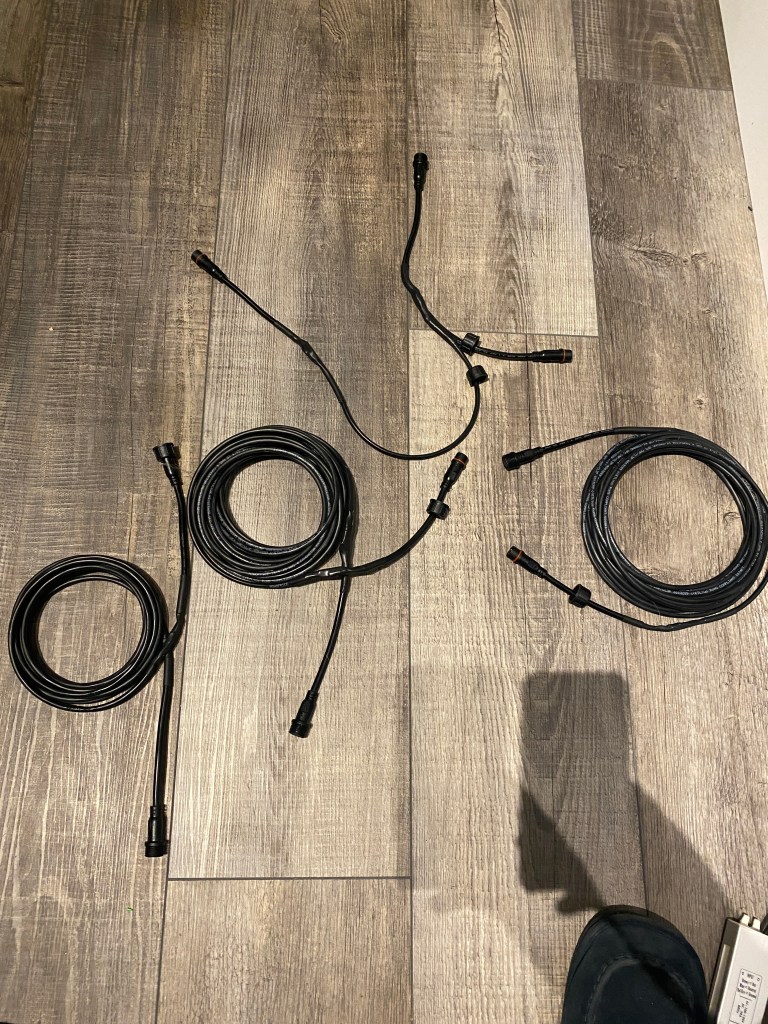
3 waterproof extension cables and a splitter 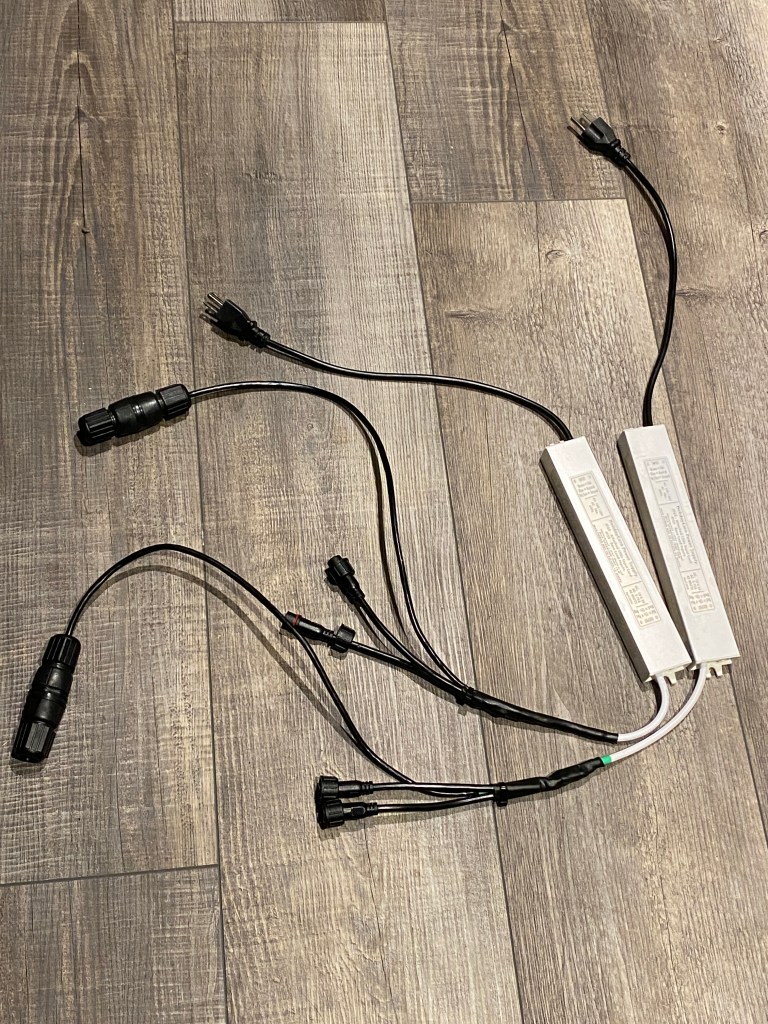
2 Power Supplies with waterproof connections
Other Projects
While building the north poles I thought it may be fun to do the same thing to my blowform Santa. This was exactly the same as building the toppers except I glued the RGBs inside Santa’s body and put the controller inside the battery holder.

Before 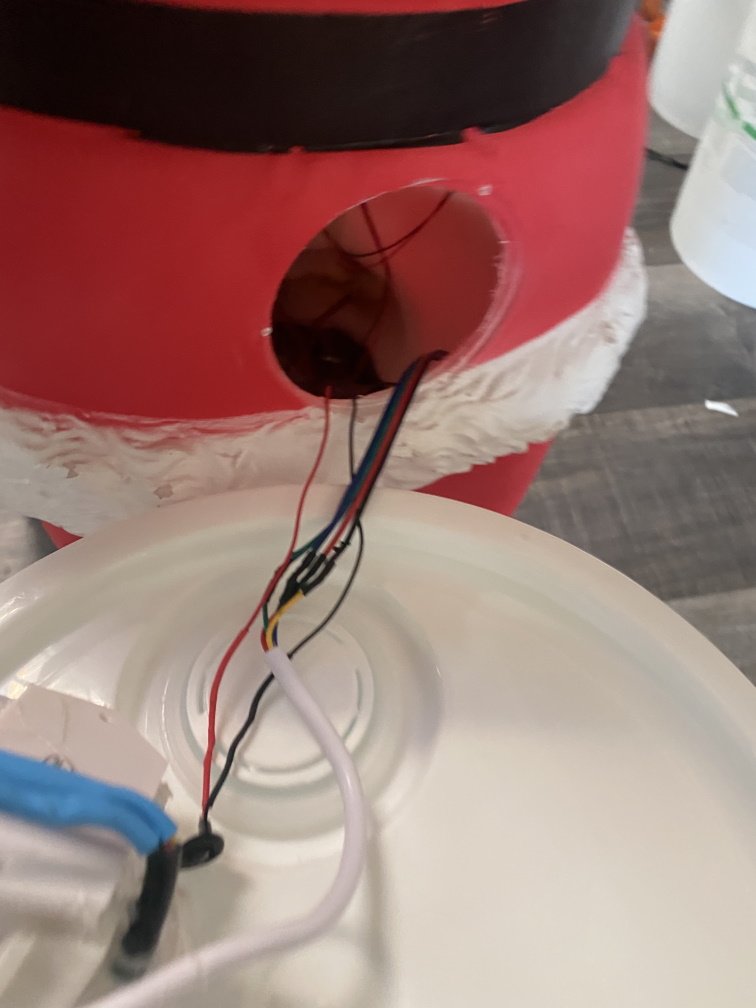
Adding the electronics 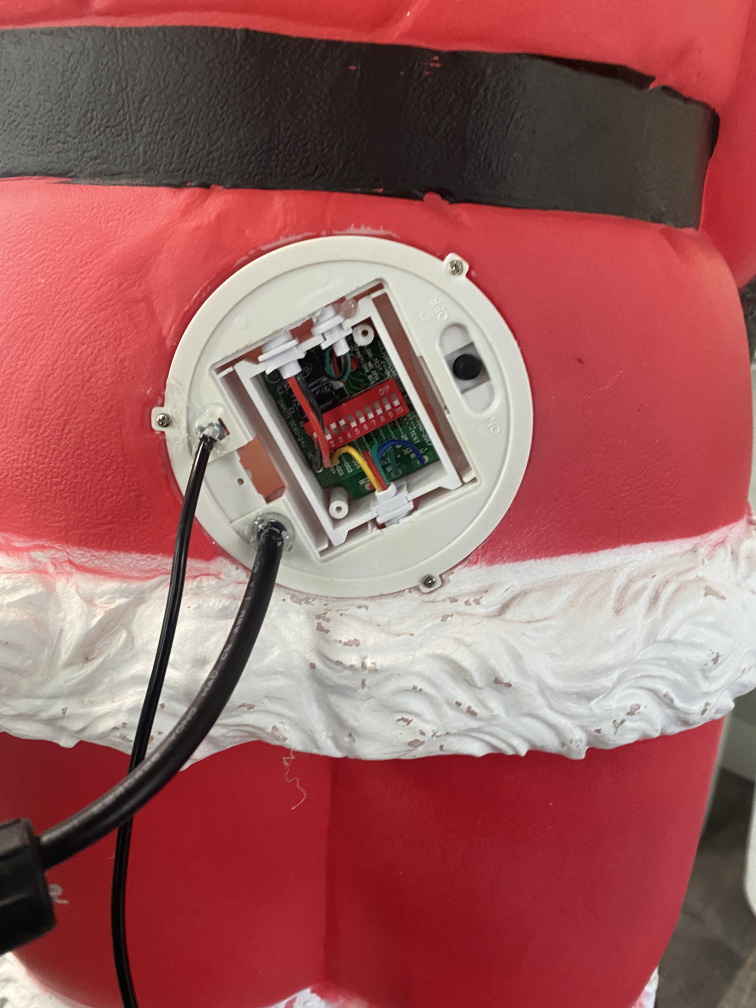
controller mounting 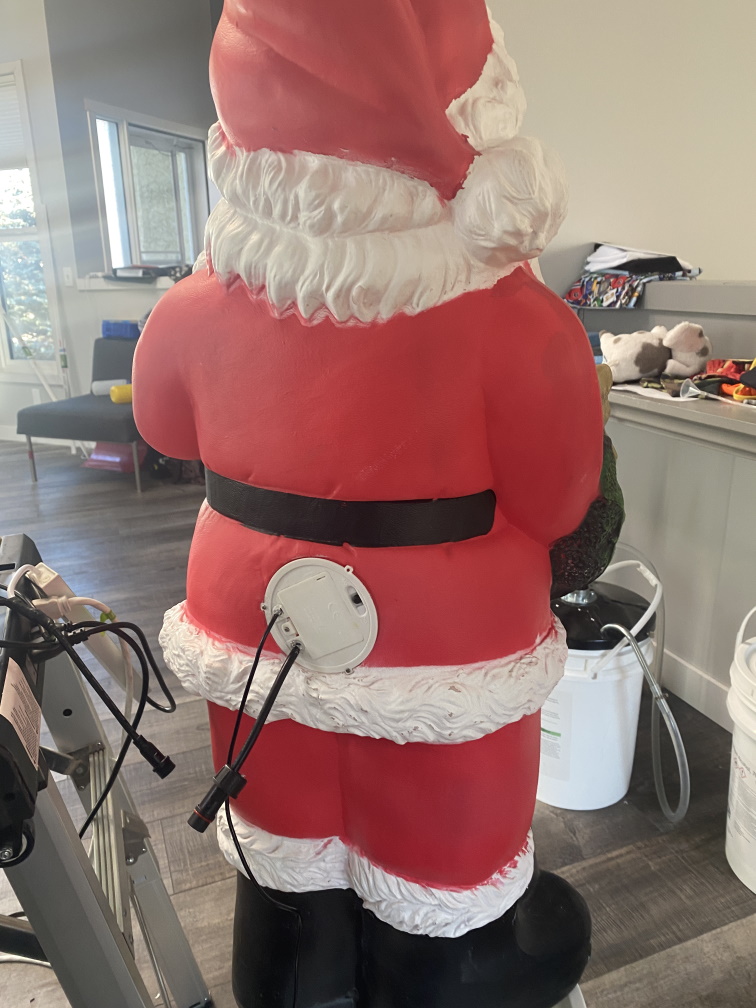
looks almost factory 
Santa Lit up
I’d never used the multi coloured lights on the Santa because they were battery powered which gave me no control, so while I was in there I rewired them to use a USB cable and adapter, now I can turn them on and off too. I took the same approach of powering the multi coloured light on Santa’s mailbox which I also needed to repair as I broke the base from the pole when removing it last season, so that is already to go again this season.
What seemed like a cheap ($20 for the initial order of controller, lights and topper) and easy project ending up being quite the opposite. The Poles ended up costing over $100 each, not taking into account all the tools I bought and also took me several weeks to complete. Overall it was worth it. I am very happy with the outcome, I learned a lot and got to dabble in DMX. I’ll likely add more of the Poles next year but for now I’m done with them until it is time to install for the season.
